|
|
Portfolio Implementation
Working with Hotglue wasn't the easiest task. As explained with my introduction to Hotglue, the tool does have it's drawbacks. Saying that though, here is my first website and I feel it was completed quickly and quite efficiently.
BACK TO TOP
___________________________________________________________________________________________
Here I will show how I went about getting my designs from paper to Hotglue.
First things first . . .
___________________________________________________________________________________________
The first thing I decided to do was to make my banner and navigation. I had an idea on what I wanted as shown in my original drawings. I like websites with an image banner at the top and I thought since I am designing my portfolio that I'd make it personal. The way I decided to do this was to take a picture of my desk. The aim of this was to give the viewer an idea of where I work and since 90% of this website was designed at this seat I thought it made sense to have it there.
When taking a photo of my desk the original file size was pretty big. Even my iPhone's camera produces far too high quality pictures (resolution of 2240x1680) for websites and I didn't want the images to take ages to load. This is especially important for the banner image as it is the first thing you see.
To the right is a resized and reduced size of the image I took. To do this I used an extremely useful and simple tool called
I used this tool for almost every single picture on this Hotglue and it has proven to be extremely useful.
Here to the right and below is an example of what the tool can quickly do. You can input your own sizes and also what file type you would like the program to output and within a few seconds it has done it for you.
The beginning . . .
___________________________________________________________________________________________
Here is the very start of my portfolio. I hadn't sorted out the background colour yet but the banner and image have stayed throughout the whole of the implementation (with minor changes to the nav bar).
The orange header that holds the nav bar above the image of my room was created in Photoshop. I'm honestly not 100% sure what it's meant to be but I liked the outcome. I was playing with brushes and effects and thought it would fit nicely in my portfolio.
Here to the left is the image I created in Photoshop. It was done completely from scratch. When adding it to my website I cropped it and made sure the file size was small enough to be loaded quickly. As you can tell from my theme as well I have used part of this image to split my pages into different sections. I feel this adds a bit of colour and also structure to my portfolio.
Progression and experimentation of design #1
Progression and experimentation of design #2
Here is pretty much where my site took off from.
The final design is very close with there only being alterations to get the nav bar to work, slight colour adjustments and also a patterned background introduced.
I got my patterned background from
My Nav Bar . . .
___________________________________________________________________________________________
The aim of the project was to design the whole website using Hotglue and not using code. We were however given the option to implement code if we were to choose to.
I personally decided I would keep coding to a minimum but I was really interested in getting a simple drop down nav bar working.
At the beginning of this project I had next to no knowledge of HTML and CSS so it was a bit tricky. To implement the nav bar I followed a tutorial. After a few weeks of HTML and CSS under my belt now to create this a tutorial wouldn't be necessary.
To the right is the styling for my nav bar. It is extremely basic but I feel it works nicely adding a bit of professionalism to my website.
At the top I also added a class called hover. I had to do this slightly weirdly. In theory all I would have to do is apply 'hover to a' (hover to links) but unfortunately that didn't work for me.
The code that didn't work for reference is:
a:hover { color:#9E9E9E; }
Luckily my div solution works and everything I apply the div to changes colour when hovered over.
Above is the code I had to input into a text box (simple list) to make my nav bar work. Hotglue actually has a nice function where you can add code to text boxes. This means you actually don't have to worry about CSS positioning as such as you can drag the boxes around to work how you want exactly.
Here I am adding inline code to this text box to make the words bold.
___________________________________________________________________________________________
New Tab . . .
When making the website there are quite a few things that actually took quite a bit of effort that may go noticed. For example one thing I have done is upload most images to imgur (one's that may need viewing in a higher resolution). What I found though was when linking images or url's the web browser would automatically open it in the tab you were in. I didn't want any of the images to actually take you away from the website but instead to open in a new tab. I learnt that you can do this via _blank when linking to a url.
Here is a small gif I made of the simple method.
Creating the pages . . .
___________________________________________________________________________________________
Once I had my design down it was pretty easy to get the ball rolling. Every page has the same consistent design throughout and therefore all I had to do was make copies of my page through the 'list all pages' tab shown to the right.
Here you can just copy a page, rename it, delete the content and add the new content. If I wasn't able to do this then the website would have been inconsistent even if I had tried my hardest to align everything perfectly.
I had one issue where I accidentally deleted a whole page I was working on which was extremely frustrating. With Hotglue once you've done something there is no way on getting it back.
___________________________________________________________________________________________
Processing Implementation and Java Issues . . .
I really enjoyed Processing as a project and everyone in the class made some great stuff. There is a major issue though. We were shown how to add a script to Hotglue so our Processing Applications could be viewed on the site and it works with one major catch.
Only I personally can view the Processing Application when I'm logged in. When testing when not logged there are huge blank spaces which is a real shame. I also had a problem on top of what was my final Processing application didn't want to show at all even with me logged in.
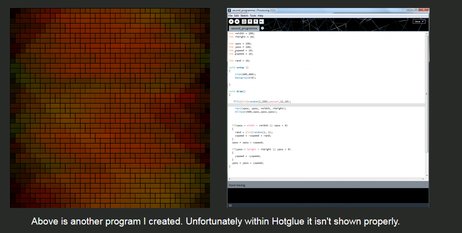
As they can't be viewed by anybody but me I am going to include screenshots of my Hotglue with them implemented below so there is a small idea of what is going on with the page (unfortunately the last one won't show so I'll show a screenshot of that in the Processing Application).
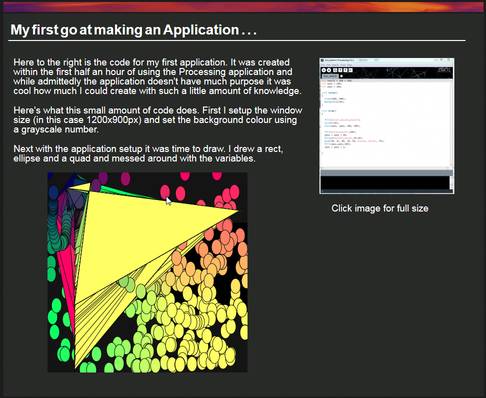
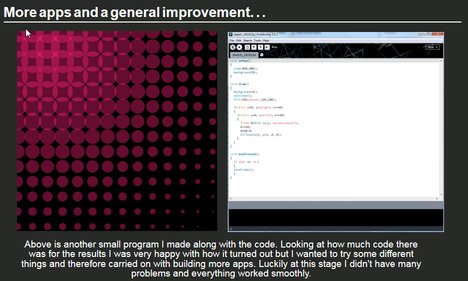
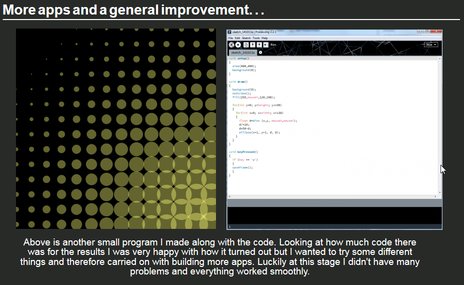


It's frustrating that I couldn't get these to show without my login and the last two images above didn't even work for me.
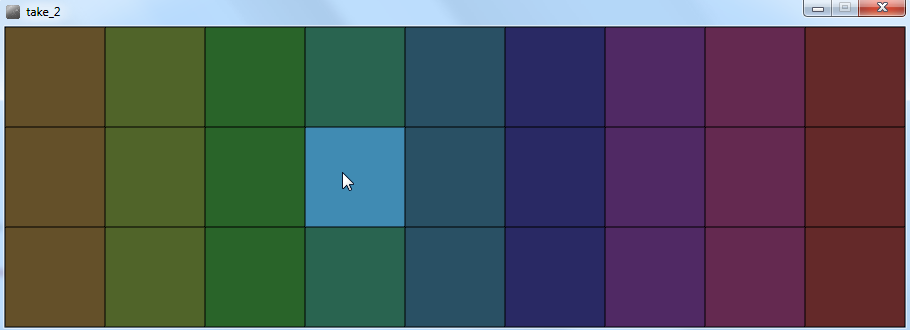
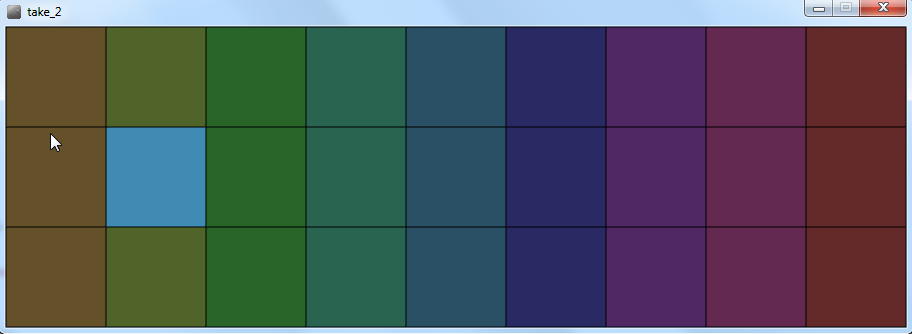
Just for a bit of explanation with the last two. The program would synthesize sound based on where your mouse was. Your mouse position would also change the colour of whichever box it was hovered over to give a sense of visualization along with the audio.
Mobile Functionality . . .
___________________________________________________________________________________________
After some testing on my mobile (iPhone 4s and safari) I can safetly say the website works well on it. Unfortunately I don't have any other mobile devices so testing can't be done on them but I would hope that all iOS devices are similar and work accordingly. There may be some problems on Android but as far as I'm aware the website should at least work on all devices.
The site looks especially nice when my phone is landscape but also good portrait.
Ideally I would love to record a video of me using the website on my phone but I have no means of doing that so I will include screenshots instead.
Left: Screenshots with iPhone 4S Landscape
___________________________________________________________________________________________
Added Notes . . .
Would have been nice to do screen capture but unfortunately software crashed. Made do with text, images and external video.
1.
2.
Fixed problem with the simpler processing applications not showing up.
Edit: Since adding the above I've added gif's to the processing page to give a small idea of what it's like moving.
Edit2: Processing apps now work.
3.
Editing is actually really hard in Hotglue. It would take a long time having to replace and extend content due to the fact that nothing responds. If I move my container boxes (the grey this text is on) they just overlap with everything else. This has proven to be slightly annoying if I've wanted to change anything.
I finally got a screen capture program to work so uploaded a video of my using my processing application.
4.

